A PJBlog Skin with Switchable Background Styles
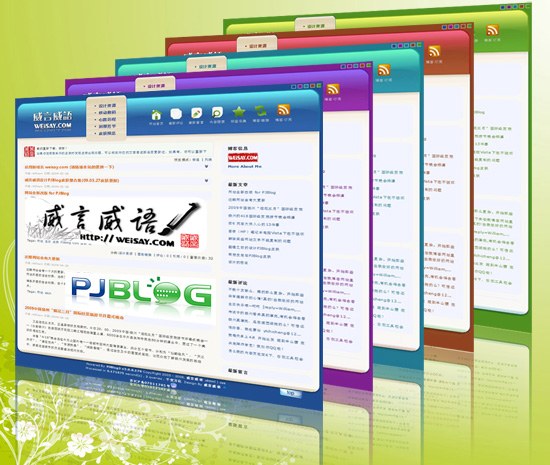
The new PJBlog skin, named “Thousand Changes,” has been completed after a period of testing and adjustment. It has been made compatible with the major browsers of its time.
The skin’s main feature is background and style switching. The functions had already been introduced earlier, so this installation note focuses on how to apply it to PJBlog.
This modification is based on PJBlog 3.0 Final v3.0.6.170 with the 2009.4.22 patch applied. Back up your files before making any changes.
One important limitation: this skin may produce errors when used in full static mode. If your blog is running in full static mode, it is better not to use it unless you switch to semi-static or fully dynamic mode.
Installation method one: modify the files manually
1. Upload the required files
After downloading and extracting the package, open the folder for files that need to be uploaded.
Upload smooth.js to the common folder. Place the images from the images folder into the blog root images directory. Then upload the five files inside the skins folder to the blog root skins directory.
2. Modify header.asp
Add the following script reference:
<script type="text/javascript" src="common/smooth.js"></script>
Place it in the appropriate position in the header.
Next, find this CSS line:
background:#FF9F88 url(images/tips.gif) no-repeat 3px 4px;}
Add the following code after it:
#MyStyleBox{
clear:both;
z-index:9999;
position:fixed;
_position:absolute;
left:0;top:0;
width:100%;
height:20px
}
#StyleBox{
margin:5px;
float:right;
list-style:none
}
#StyleBox li{
display:inline;
float:left;
padding-left:5px;
list-style:none}
#StyleBox span{
visibility:hidden;
height:10px;width:10px}
#StyleBox a{float:left;width:10px;
height:10px;border:1px solid #DDD;
background:#FFF;line-height:100px;
overflow:hidden}
Then find:
<body onLoad="initJS()" onkeydown="PressKey()">
Add this immediately after it:
<div id="MyStyleBox">
<ul id="StyleBox">
<li><a style="BACKGROUND: #204d90" href="#d2Vpc2F5XzI3">深海蓝</a></li>
<li><a style="BACKGROUND: #7e2090" href="#dnYx">罗兰紫</a></li>
<li><a style="BACKGROUND: #207b90" href="#dnYy">天空蓝</a></li>
<li><a style="BACKGROUND: #8f4321" href="#dnYz">玫瑰红</a></li>
<li><a style="BACKGROUND: #509020" href="#dnY0">祖母绿</a></li>
</ul>
</div>
<script type="text/javascript">
SetStyleBox();
3. Modify footer.asp
Find:
<div id="foot">
Add the following after it:
<a class="vtop" href="#" onfocus="this.blur();" onclick="goto_top(); return false">Top</a>
4. Modify common.js in the common folder
First, find this comment:
//转换AccessKey For IE
Add a new line after it:
vMenu()
Then add the following code to the end of common.js:
getCookie_v=function(a){
var b=a+"=",c,d;
if(document.cookie.length>0)
{
c=document.cookie.indexOf(b);
if(c!=-1){
c+=b.length;
d=document.cookie.indexOf(";",c);
if(d==-1)
d=document.cookie.length;
return unescape(document.cookie.substring(c,d));
}else return('');
}else return('');
}

setCookie_v=function(a,b){
var c=new Date();
var d=new Date();
d.setTime(c.getTime()+1000*60*60*24*365);
document.cookie=a+"="+escape(b)+";path=/"+"; expires="+d.toGMTString();
}
function SetStyleBox(){
try{
var items = document.getElementById("StyleBox").getElementsByTagName("a");
var t = getCookie_v("SBox");
if(t=="") {
        ChangeStyle(items[0].href);
}else {
        ChangeStyle(t);
}
for(var j = 0; j < items.length; j++) {
        items[j].onclick = function(){
        setCookie_v("SBox", this.href);
        return ChangeStyle(this.href);
        }
        items[j].title = items[j].innerHTML;
}
}catch(e){}
}

function vChgMenu(obj) {
        var ar = new Array("#ffe1ba", "#f9ffba", "#c5ffba", "#fed6fb", "#c5fcfd");
        var v = document.getElementById("menu").getElementsByTagName("a");
        for(var i = 0; i < v.length; i++) {
                if(obj == v[i]){
                        v[i].style.backgroundColor = ar[i];
                        break;
                }
        }
}
function vMenu() {
        var v = document.getElementById("menu").getElementsByTagName("a");
        for(var i = 0; i < v.length; i++) {
                v[i].onmouseover = function() {
                        vChgMenu(this);
                }
                v[i].onmouseout = function() {
                        this.style.backgroundColor = "";
                }
        }
}
function ChangeStyle(s){
        var ss, str, ff = false, sp, le = 0;
        if(document.all){
                ss = document.styleSheets;
        } else {
                ff = true;
                ss = document.getElementsByTagName("link");
        }
        s = decode64(unescape(s.match(/[^\\\/#]+$/)));

        for(var i = 0; i < ss.length - 2; i++) {
                if(ff && ss[i].rel != "stylesheet")continue;
                str = "";
                le = ss[i].href.indexOf("skins");
                if(le < 0) continue;
                sp = ss[i].href.substr(le, ss[i].href.length).split("/");
                for(var j = 0; j < sp.length; j++){
                        if(j == 1) {
                                str += s;
                        }else {
                                str +=sp[j];
                        }
                        if(j!=sp.length - 1)
                                str += "/";
                }
                ss[i].href = str;
        }
        return false;
}
var keyStr = "ABCDEFGHIJKLMNOPQRSTUVWXYZabcdefghijklmnopqrstuvwxyz0123456789+/=";
  function decode64(input) {
      var output = "";
      var chr1, chr2, chr3 = "";
      var enc1, enc2, enc3, enc4 = "";
      var i = 0;

          if(input.length%4!=0)
          {
                    return "";
          }
      var base64test = /[^A-Za-z0-9\+\/\=]/g;
          if (base64test.exec(input))
          {
                    return "";
          }
      do {
         enc1 = keyStr.indexOf(input.charAt(i++));
         enc2 = keyStr.indexOf(input.charAt(i++));
         enc3 = keyStr.indexOf(input.charAt(i++));
         enc4 = keyStr.indexOf(input.charAt(i++));
         chr1 = (enc1 << 2) | (enc2 >> 4);
         chr2 = ((enc2 & 15) << 4) | (enc3 >> 2);
         chr3 = ((enc3 & 3) << 6) | enc4;

                 output = output + String.fromCharCode(chr1);
         if (enc3 != 64) {
                        output+=String.fromCharCode(chr2);
         }
         if (enc4 != 64) {
                        output+=String.fromCharCode(chr3);
         }
         chr1 = chr2 = chr3 = "";
         enc1 = enc2 = enc3 = enc4 = "";
      } while (i < input.length);
      return output;
   }
5. Modify library.asp
Open library.asp inside the common folder and find:
Calendar = "<div id=""Calendar_Body""
Add this after it:
class=""month"&C_Month&"""
6. Create a new module
Create a module with the module ID set to Topvv. Leave the module name blank, and set the sort order to 0.

Edit the module HTML and enter the following:
<ul>
<li><a onfocus="this.blur();" href="default.asp"><br/>网站首页</a></li>
<li><a onfocus="this.blur();" href="search.asp?searchType=Comments"><br/>最新评论</a></li>
<li><a onfocus="this.blur();" href="LoadMod.asp?plugins=GuestBookForPJBlog"><br/>最新留言</a></li>
<li><a onfocus="this.blur();" href="#Side_Search"><br/>内容搜索</a></li>
<li><a onfocus="this.blur();" href="tag.asp"><br/>标签云集</a></li>
<li><a onfocus="this.blur();" href="bloglink.asp">
博客链接</a></li>
<li><a onfocus="this.blur();" href="feed.asp" target="_blank" rel="noopener noreferrer">
博客订阅</a></li>
</ul>
7. Final settings
There are a few adjustments worth making after the files are in place.
First, it is best to remove the default search module from the homepage-only position, though leaving it unchanged will not have much impact.
Second, go to log category management and choose five categories. Set those five categories to display in the “both” position, and set the remaining categories to the sidebar.
If your blog does not have enough categories, the package includes a PSD file for the top image. You can adjust the horizontal menu size yourself so that the header layout still looks balanced.
Installation method two: overwrite with prepared files
If you have not previously modified the files involved above, open the folder containing the already modified files after extraction and upload them directly to the matching locations, overwriting the existing files.
The other upload-required files in the package still need to be uploaded as described earlier.
Skin making takes time and effort, and this one took even more work than usual. Please respect the work that went into it.